Building Your Ultimate PC: A Step-by-Step Guide
Building your own PC can be an incredibly rewarding experience, offering the perfect blend of customization, performance, and value. Whether you’re a gamer, a video editor, or just a tech enthusiast, a custom-built PC can meet your specific needs better than any pre-built system. But where do you start? In this guide, we’ll walk you through the process of building your ultimate PC, from selecting components to assembling your machine. If you’ve ever wondered how to create a computer tailored just for you, read on to find out how.
Step by Step Guide
1. Planning Your Build
Before purchasing any parts, it’s crucial to plan your build according to your needs and budget. Here are some key considerations:
- Purpose: Define what you’ll be using your PC for (gaming, video editing, general use, etc.).
- Budget: Set a realistic budget for your build. Remember to include all components and peripherals.
- Compatibility: Ensure all components are compatible with each other.
2. Choosing Your Components
Here’s a breakdown of the essential components you’ll need:
- CPU (Central Processing Unit): The brain of your computer. Choose between AMD and Intel based on performance and budget.
- GPU (Graphics Processing Unit): Crucial for gaming and video editing. Nvidia and AMD are the main contenders.
- Motherboard: Select one that supports your CPU and has the necessary features (RAM slots, expansion slots, etc.). Consider options from ASUS, MSI, and Gigabyte.
- RAM (Random Access Memory): 16GB is usually sufficient for gaming, but 32GB or more might be necessary for video editing and other intensive tasks. Check out Corsair and G.Skill.
- Storage: Decide between SSDs (faster, more expensive) and HDDs (slower, cheaper). NVMe SSDs offer the best performance. Look at options from Samsung and Western Digital.
- Power Supply Unit (PSU): Ensure it provides enough power for all your components. A good rule of thumb is to have a little extra wattage for future upgrades. Brands like EVGA and Corsair are reliable.
- Case: Choose a case that fits your components and has good airflow. Consider cases from NZXT and Cooler Master.
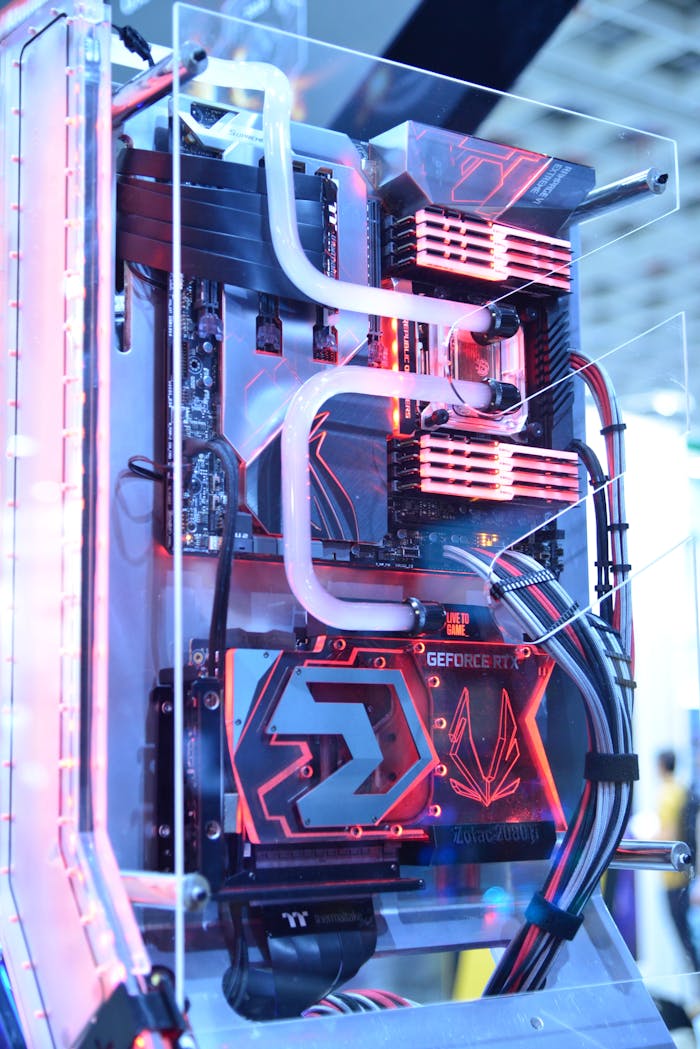
- Cooling: Depending on your CPU and GPU, you might need additional cooling solutions like extra fans or liquid cooling. Noctua and Corsair are excellent choices.
3. Assembling Your PC
Once you have all your components, it’s time to put everything together:
- Prepare Your Workspace: Ensure you have a clean, static-free environment to work in. Gather all necessary tools, like a screwdriver and thermal paste.
- Install the CPU: Carefully place the CPU into the motherboard socket and secure it. Check out this CPU installation guide for detailed instructions.
- Install RAM and Storage: Insert the RAM sticks into the motherboard slots and attach your SSD or HDD.
- Mount the Motherboard: Place the motherboard inside the case and screw it into place. Here’s a helpful motherboard mounting tutorial.
- Install the GPU: Insert the GPU into the appropriate PCIe slot on the motherboard.
- Connect Power Supply: Attach the power supply to the case and connect all necessary power cables to the motherboard, CPU, GPU, and storage.
- Attach Cooling Solutions: Install any additional fans or liquid cooling systems to ensure proper airflow and temperature management. This cooling installation guide can help.
- Cable Management: Neatly organize and secure cables to improve airflow and aesthetics.
4. Setting Up Your Software
With your hardware assembled, it’s time to install the necessary software:
- Install the Operating System: Use a bootable USB drive to install your preferred OS (Windows, Linux, etc.). Follow this OS installation guide for a step-by-step process.
- Install Drivers: Ensure all your components are running optimally by installing the latest drivers from the manufacturers’ websites.
- Update and Optimize: Run any system updates and tweak settings to optimize performance based on your needs.
Product Summary:
- CPUs: AMD, Intel
- GPUs: Nvidia, AMD
- Motherboards: ASUS, MSI, Gigabyte
- RAM: Corsair, G.Skill
- Storage: Samsung, Western Digital
- PSUs: EVGA, Corsair
- Cases: NZXT, Cooler Master
- Cooling Solutions: Noctua, Corsair
- Guides and Tutorials: CPU installation guide, motherboard mounting tutorial, cooling installation guide, OS installation guide
Conclusion
Building your own PC is a fantastic way to get exactly what you want out of a computer while gaining a deeper understanding of how these machines work. While the process may seem daunting at first, following this guide step-by-step will help you create a powerful, personalized PC that meets your unique needs. Remember, the key to a successful build is careful planning, choosing compatible components, and taking your time during assembly. Happy building!


